Brain Tumor Classification & Segmentation 🧠
Project Overview
This project implements a complete computer vision pipeline for brain tumor classification and segmentation using MRI images.
- Classification: Detect tumor presence using ResNet18.
- Segmentation: Extract tumor regions using ResUNet with a ResNet18 encoder.
- Deployment: End-to-end system ready for demo or further evaluation.
- Role: Model training, preprocessing, and deployment.
- Achievement: Finalist in an AI Hackathon.
🔧 Technologies & Tools
- Programming Languages: Python
- Libraries: PyTorch, torchvision, segmentation_models_pytorch, scikit-learn, numpy, pandas, matplotlib, PIL
- Deployment: Streamlit
- Version Control: Git, GitHub
🧩 Pipeline Overview
1. Dataset & Loading
- MRI images and corresponding tumor masks.
- Split into train (80%), validation (20%), and test sets.
2. Preprocessing & Augmentation
- Resize images/masks to
224×224(ResNet18) or256×256(ResUNet). - Data augmentation:
- Horizontal/vertical flips
- Random rotations
- Color jitter (classification only)
- Convert to tensor; round masks to 0/1.
3. Model Architecture
- ResNet18: Classifier for tumor detection (4 classes).
- ResUNet: Segmentation model with ResNet18 encoder, 1-channel output mask.
4. Training
- Loss Functions:
- Classification:
CrossEntropyLoss - Segmentation:
DiceLoss(binary)
- Classification:
- Optimizer: Adam,
lr=1e-4 - Scheduler: ReduceLROnPlateau (classification)
- Early stopping and model checkpointing based on validation performance.
5. Evaluation & Inference
- Predict tumor class or segmentation masks for test images.
- MC Dropout implemented for uncertainty estimation.
- Segmentation outputs thresholded at 0.5.
6. Results
ResNet18 Evaluation
              precision    recall  f1-score   support
glioma           0.99       0.98      0.99       254
meningioma       0.98       0.98      0.98       306
no_tumor         0.99       1.00      0.99       140
pituitary        0.99       0.99      0.99       300

accuracy                               0.99      1000
macro avg        0.99       0.99      0.99      1000
weighted avg     0.99       0.99      0.99      1000
6. Deployment
- Save best models:
best_resnet18.pth,best_resunet.pth. - Streamlit app allows users to upload images and get predicted class and tumor mask.
Demo Images
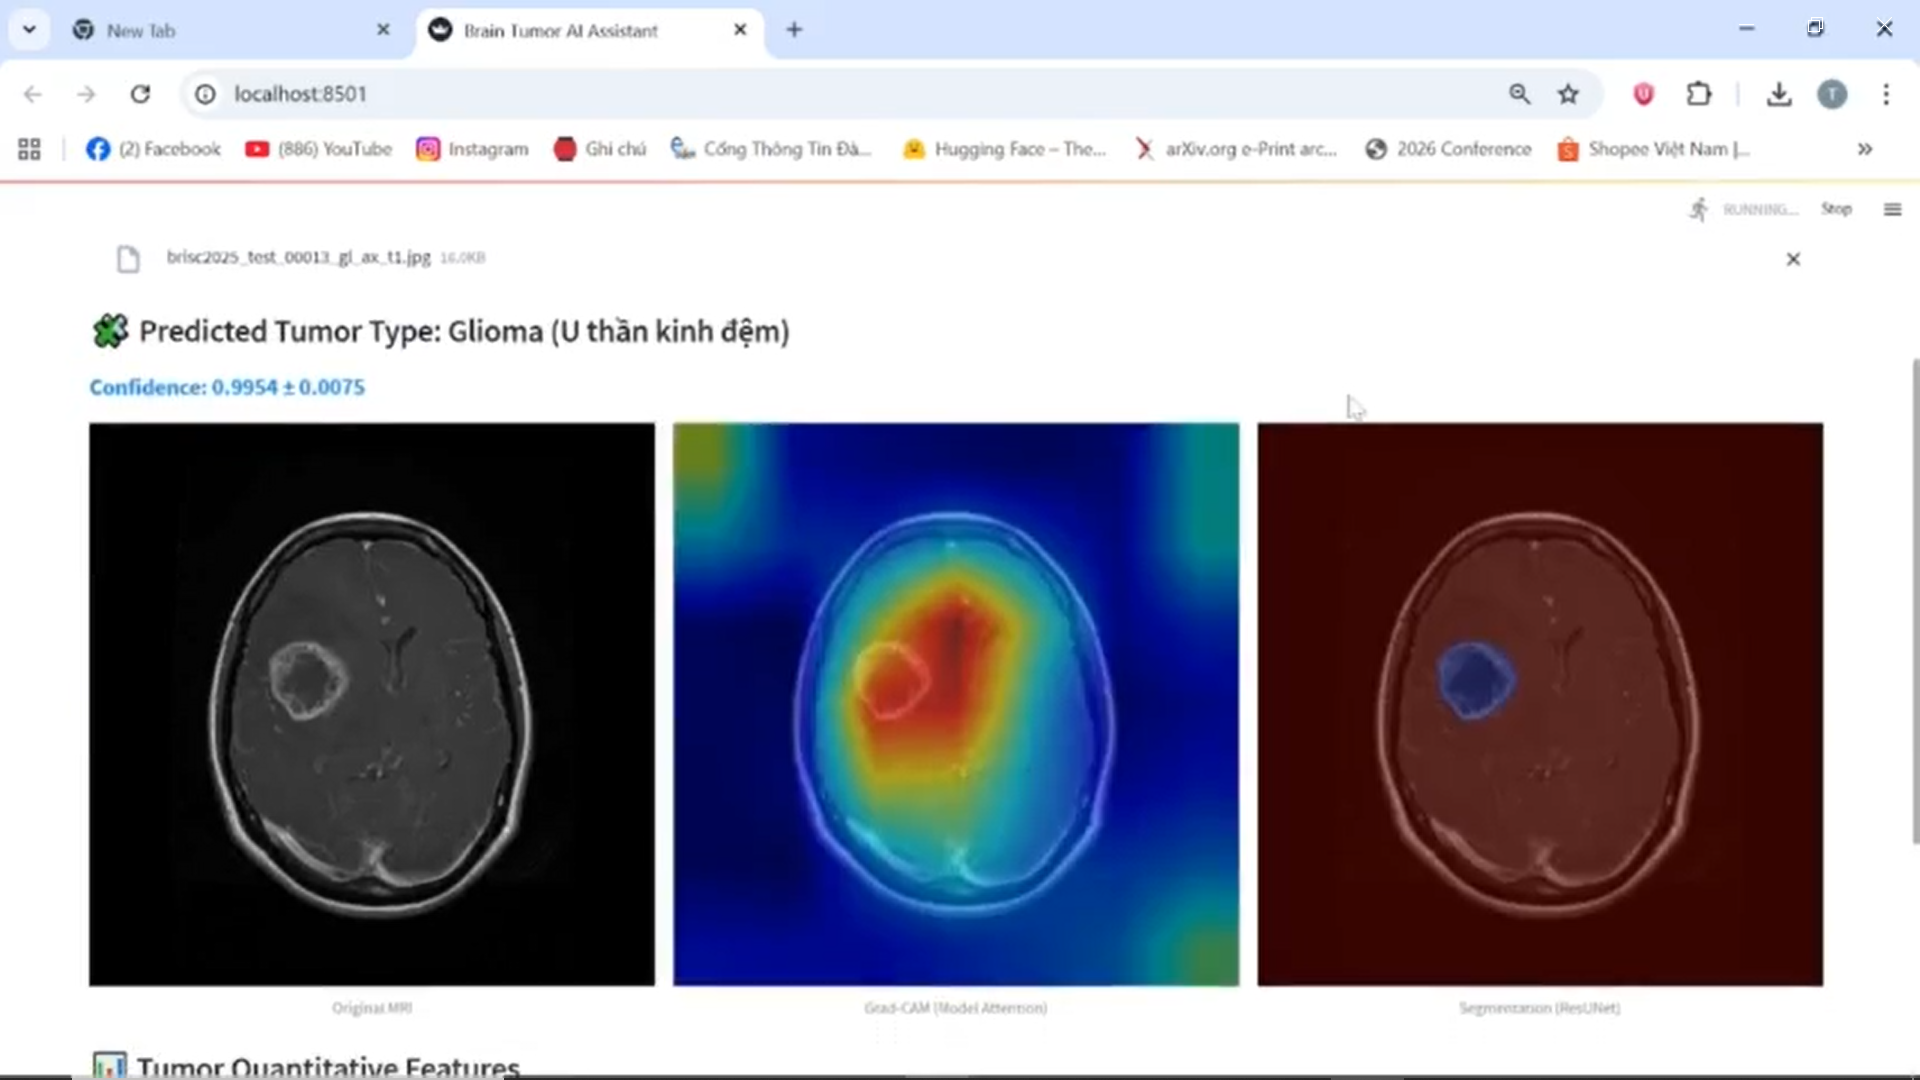
Classification and Segmentation Results
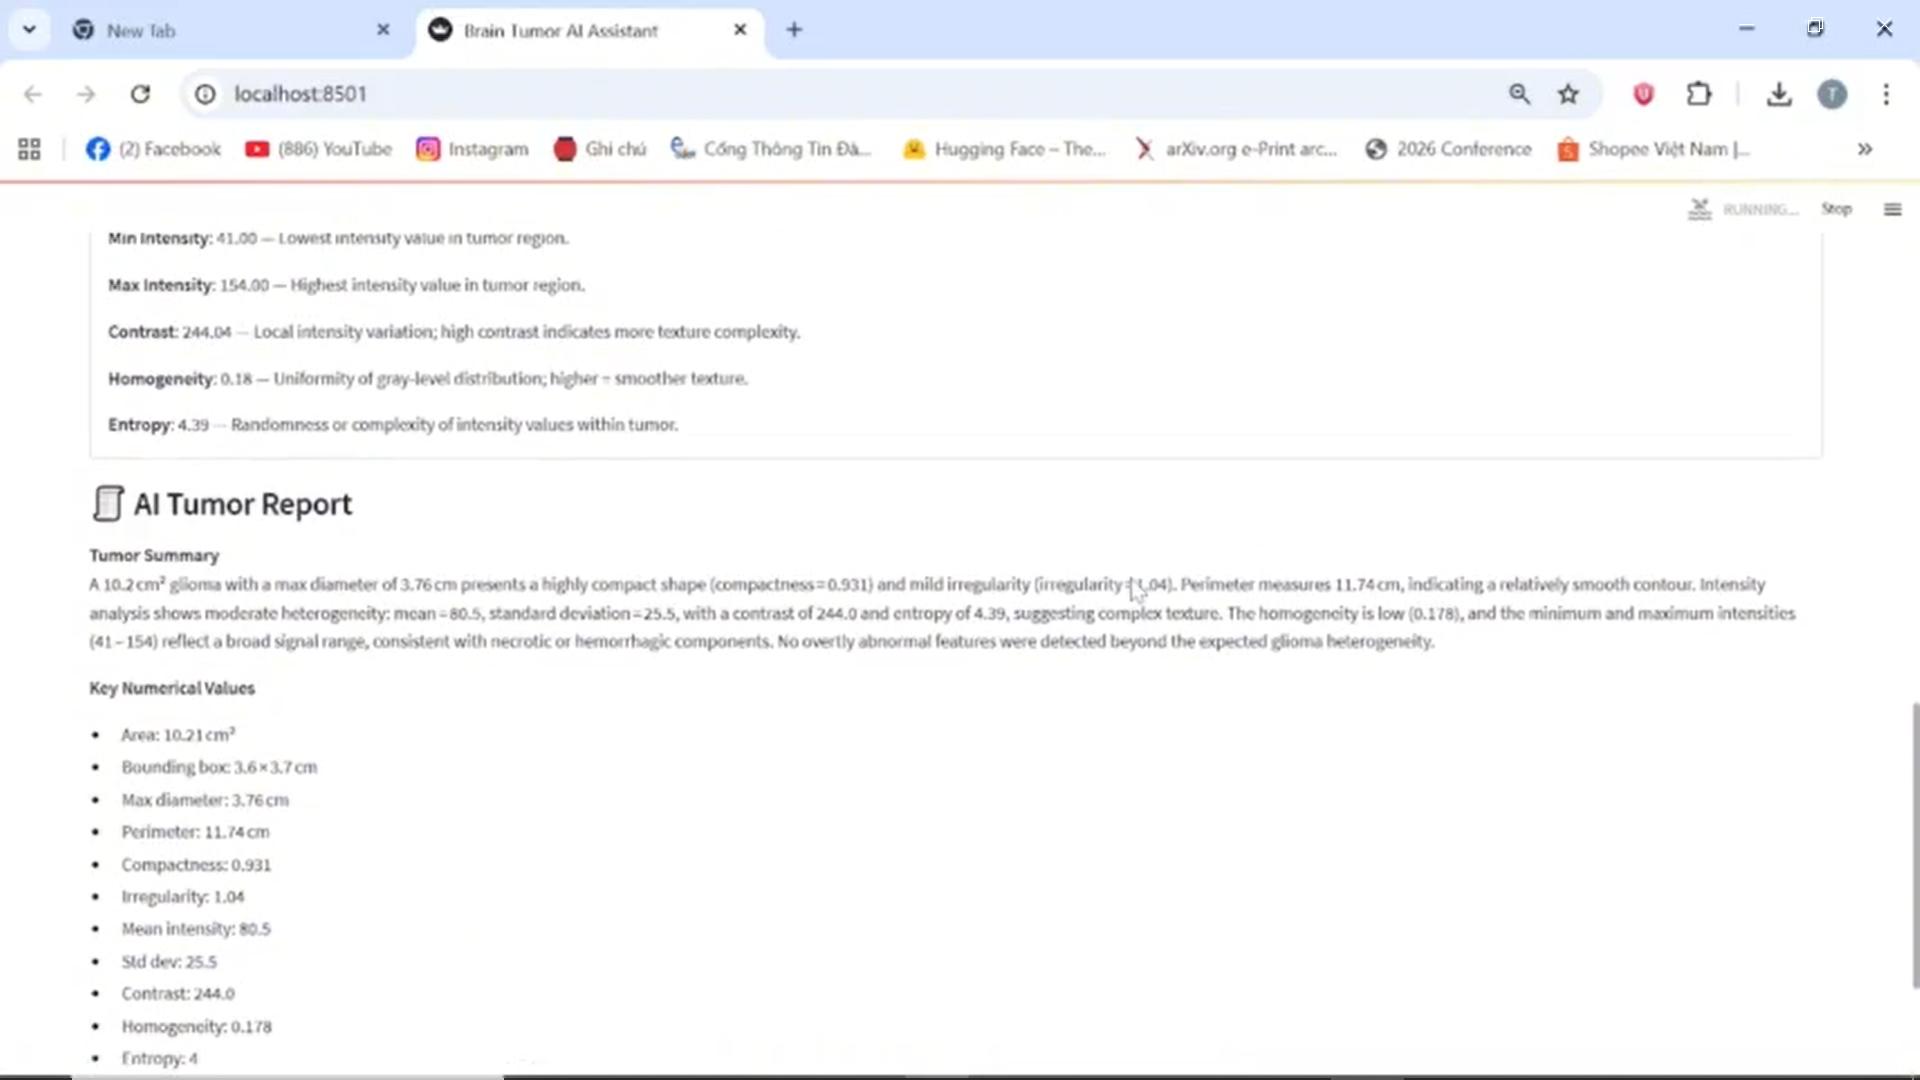
LLM-generated Medical Report
📦 Environment Setup Guide
1. Install Anaconda
Anaconda is recommended for managing Python environments and packages.
- Step 1: Download Anaconda:
👉 https://www.anaconda.com/download - Step 2: Follow installation instructions.
Open Anaconda Prompt (Windows) or terminal (macOS/Linux) after installation.
2. Create the Conda Environment
- Step 1: Clone this repository
git clone https://github.com/<your-username>/<your-repo-name>.git cd <your-repo-name> - Step 2: Create the environment from environment.yml:
conda env create -f environment.yml - Step 3: Activate the environment:
conda activate <env-name>
🚀 Running the Streamlit App
###1. Navigate to the project root directory
Ensure you are in the parent directory of the App/ folder:
project-root/
│
├── App/
│   └── Streamlit_Demo/
│       └── app.py
├── environment.yml
└── README.md
2. Run the app
streamlit run App/Streamlit_Demo/app.py
Terminal will show:
You can now view your Streamlit app in your browser.

  Local URL: http://localhost:8501
  Network URL: http://192.168.x.x:8501
Open the Local URL in your browser to access the app.
Stop anytime with Ctrl + C.